• Categories

  • Archives

  • Meta

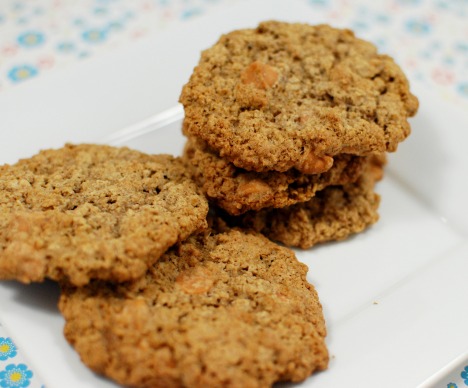
Oatmeal Butterscotch Cookies

Butterscotch is pretty close to chocolate on my list of favorite dessert flavors.  I’m definitely drawn to desserts with butterscotch, and I think it goes really well in oatmeal, so these cookies jumped out at me.  I also wanted to try using oat flour in the place of regular flour.  I used a food processor to process the oats to the right consistency, then replaced them for the regular flour in the recipe.  This worked out quite well, and gave the cookies a great texture and flavor.  These were delicious cookies- very chewy, and the butterscotch gave them more depth.

Oatmeal Butterscotch Cookies
Source: Erin’s Food Files (originally Cindy McCain’s recipe published in Good Housekeeping
)

Ingredients:

3/4 cup butter, softened
3/4 cup sugar
3/4 cup brown sugar
2 large eggs
1 tsp vanilla extract
1 1/4 cups all-purpose flour (I used oat flour)
1 tsp baking soda
1/2 tsp ground cinnamon
3/4 tsp salt
3 cups rolled oats
1 1/2 cups butterscotch chips

Directions:

Preheat oven to 375F. Line a baking pan with parchment paper.

In a large bowl, cream together butter and sugars. Blend in eggs and vanilla until mixture is smooth.

In a medium bowl, whisk together flour, baking soda, cinnamon and salt. Stir into butter mixture, then mix in the oats and butterscotch chips.

Drop rounded tablespoonfuls (large balls) of cookie down onto the prepared baking sheets, leaving about 2 inches between each cookie to allow for spread.

Bake for 10-11 minutes, until the edges begin to brown. Let cookies cool on the baking sheet for about 5 minutes, then transfer to a wire rack to cool completely before storing in an airtight container.

Strawberry Lemonade Cupcakes

Every year I get excited when I see strawberries in the grocery store.  I’m not really big on fruit desserts, but I do love strawberry shortcake, cupcakes, and ice cream.  I saw these cupcakes at the perfect time and decided to make them to celebrate this beautiful warmer weather that we’ve been blessed with!  These cupcakes were a pretty standard white cupcake with lemon flavoring, but it was the frosting that made them stand out.  This frosting was simply incredible!  I like pretty much any frosting, but a Swiss buttercream works great in sweets because it’s not overly sweet.  It’s more about the creamy,  buttery texture.  I added an entire carton of strawberries for extra flavor, which was just right for me.  David said that this is pretty much his favorite cupcake and he wants me to find even more excuses to make that frosting again!  These would be a great dessert to make for a spring cookout or for Mother’s Day- the perfect way to celebrate spring!

Strawberry Lemonade Cupcakes
Source: Confections of a Foodie Bride, originally from Martha Stewart

3 cups flour
1 Tbsp baking powder
1/2 tsp salt
1 cup (2 sticks) unsalted butter, at room temperature
2 cups sugar
4 eggs, at room temperature
3 Tbsp lemon zest (from 3 lemons)
2 Tbsp fresh lemon juice (from 1-1.5 lemons)
1 tsp vanilla
1 cup buttermilk
Strawberry Buttercream, recipe follows

Preheat oven to 325 degrees.  Prepare muffin tin by either spraying with baking spray or lining with paper liners (my preferred method).

Whisk flour, baking powder and salt together and set aside. Cream butter and sugar on a high until pale, light, and fluffy (about 5 minutes). Add eggs one at a time, mixing thoroughly before adding the next one. Add lemon zest, lemon juice, and vanilla. Turn mixer to the low, and add the dry ingredients in three batches, alternating with the buttermilk in two batches. Mix only until just incorporated.

Fill each muffin cup ~3/4 full. Bake for 25 minutes or until a skewer shows only moist crumbs attached, rotating the pans at the halfway point. Allow cupcakes to cool completely in the pans before removing.

Yields: 24 cupcakes

Strawberry Buttercream Frosting
2 cups sugar
8 egg whites
3 sticks butter, room temperature
4 Tbsp lemon juice
1 pint strawberries, pureed
1 tsp vanilla

Place the stand mixer bowl over a simmering pot of water (the bottom of the bowl should not touch the water). Whisk the sugar and egg whites until the sugar is dissolved and the mixture registers 160 degrees with a candy thermometer.

Place bowl on the stand mixer fitted with the whisk attachment and whisk on high speed until the mixture is cool and holds stiff, glossy peaks (approximately 10 minutes). Change to the paddle attachment and beat in one tablespoon of butter at a time on medium. The mixture might appear curdled but keep going, it will pull back together. Add lemon juice, strawberry puree, and vanilla. Increase speed to high and beat until the frosting reincorporates and is smooth and fluffy (this will take about 10 minutes).

Yields: Frosting for 24 cupcakes

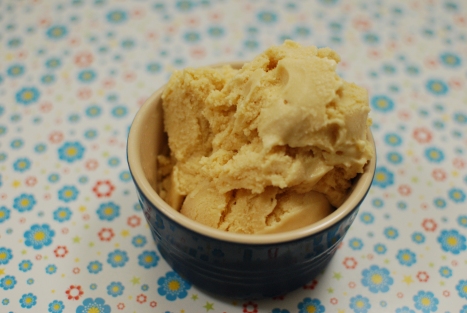
Burnt Sugar Ice Cream (TWD)

Oh, how I love ice cream!  I’ve never made an ice cream like this one, so I was excited to see how it would turn out.  It’s an egg-based ice cream, which I’ve gotten very comfortable with making.  I like egg-based recipes because of their rich, creamy texture.  This ice cream starts off very similar to the way you would go about making caramel, so I was not surprised with its taste.  It has a sweet, caramel flavor- I would even compare it to dulce de leche.  Usually I’m all about add-ins for ice cream, but I think this one is perfect on its own.

You can view the recipe on Becky’s blog, and visit the TWD blog to see how everyone else’s turned out.

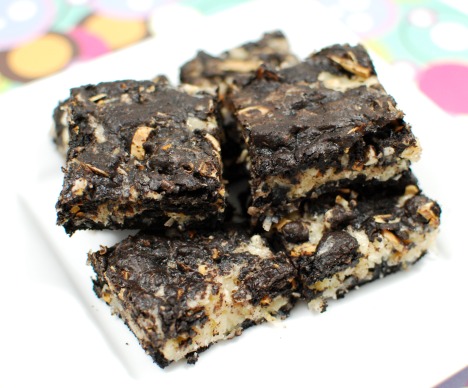
Almond Joy Brownies

I recently made Almond Joy Ice Cream, and Katrina left a comment on my blog saying that she just posted these brownies earlier that week.  I’m not sure how I missed her post, but I’m sure glad she pointed it out to me!  I said in my previous post that I love Almond Joy candy bars, but the flavor is even better in these brownies.  The best part about these brownies for me was that they are gluten free, thanks to the use of coconut flour.  It’s fine to use regular flour if you don’t care about them being gluten free, but I would recommend using coconut flour if you can because it gives the brownies a stronger flavor.

These brownies were only slightly more complicated than regular brownies to make because you have the coconut layer in between.  My only issue was that there wasn’t really enough brownie batter for both a bottom and top layer, so next time (and you better believe I’m making these again!) I will increase the brownie batter.  I reflected those changes below.  These are the perfect brownies to enjoy with some ice cream, so when you make them, be sure to make some Almond Joy Ice Cream to pair them together!

Almond Joy Brownies
Source: adapted from Baking and Boys

¾ cup cocoa powder (recommended: Hershey’s Special Dark)

¾ cup (1 ½ sticks) unsalted butter

3 large eggs, room temperature

1 ½ cups granulated sugar

1 teaspoon vanilla

½ teaspoon almond extract

½ teaspoon salt

3/8 cup coconut flour (could also use the same amount of all purpose flour)

2 cups shredded, sweetened coconut

2/3 cup sweetened condensed milk

Pinch salt

2/3 cup toasted, chopped almonds

Preheat oven to 325 degrees.  Line an 8×8-inch square baking pan with foil, and spray foil lightly with baking spray.

Melt butter in medium saucepan over medium heat.  Remove from heat, and whisk together well.  Let stand 3 minutes.  Whisk in eggs one at a time, then add sugar and vanilla and almond extracts. Fold in salt and flour and stir until ingredients disappear into batter.  Spread half the batter evenly in pan.

Combine coconut, salt, and sweetened condensed milk in a bowl. Spread dollops of coconut mixture over the brownie batter.  Sprinkle chopped almonds over coconut mixture.  Spread remaining brownie batter over coconut mixture.  Smooth carefully with a knife.  Bake 20-25 minutes, or until toothpick inserted in center comes out with a few moist crumbs attached.  Let cool on a cooling rack, then chill in the refrigerator for at least 2 hours.  Cut into squares.

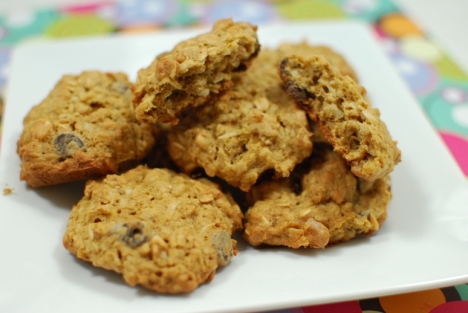
Chockablock Cookies (TWD)

I love mix-ins.  It’s my favorite part of a brownie, cookie, ice cream, or pretty much any other treat.  So, it should come as no surprise that I liked these.  These cookies are so full of mix-ins, and so adaptable to your tastes.  I used walnuts, coconuts, and chocolate chips, but wished I had used some raisins too.  They would also be good with butterscotch chips, white chocolate chips, craisins, pecans, M&Ms…the possibilities are endless.  These had such fabulous texture too- they remained soft and chewy after baking, and were able to handle all the added ingredients.  They were sweet, but not too sweet to where you couldn’t enjoy the cookie.  You really can’t go wrong with these!  Mary chose the recipe, which you can find on her blog, and you can visit the TWD blog so see everyone’s variations.

EDIT: I wanted to add that I used all butter and it worked out just fine.  I rarely have shortening on hand!

Carne Guisada (Mexican Beef Stew)

DSC_1317

Recently, we had a rainy day and I thought it would be nice to sit down to some comfort food.  I found a recipe for beef stew, which I had been wanting to make, but this one had a Mexican spin on it.  I was curious to see how the Mexican flavors played out in the recipe, so I decided to try it.

Many beef stews take a while to cook.  This one requires one hour of simmering time, but the rest of the preparation is pretty quick, so you could still make it on a weeknight (if you prep the night before, it would be even quicker!).  I just love the way this smelled while it was cooking.  The simmering time definitely built up the anticipation for this, but it was worth it!  This was such a delicious dinner.  I loved how all the flavors came together.   It had some heat, but it wasn’t too spicy.  It was a great spin on classic beef stew, and something I will make again for sure!  The recipe said that you can serve this with warm flour tortillas, which I think would be delicious, though we ate it as is.

Carne Guisada
Source: The Tex-Mex Cookbook by Robb Walsh

2 tablespoons vegetable oil

2 pounds sirloin tips, trimmed of all fat and gristle and cut into ½-inch cubes

1 cup green bell pepper, chopped

1 cup chopped onions

1 pound small red potatoes, peeled and cut into ½-inch cubes

4 garlic cloves, minced

1 serrano chile, minced (I used a jalapeno)

½ cup chopped tomatoes

½ teaspoon salt

1 teaspoon pepper

½ teaspoon ground cumin

½ cup tomato sauce

1 tablespoon flour (I used cornstarch)

Heat the oil in a large skillet over high heat.  Add the meat and brown for 10 minutes.  Do not drain the liquid.  Add the bell pepper, onion, potatoes, garlic, chile, and tomatoes, and continue cooking for 10 minutes.  Add the spices, the tomato sauce, and 2 cups water.  Reduce heat to low, cover and simmer for 1 hour or until the meat is very tender.  Add more water as required.  Season to taste.

In a small cup combine 3 tablespoons cooking liquid with the flour.  Stir to remove any lumps, then add to the carne guisada, mixing well until evenly thickened.

Loaded Potato Skins

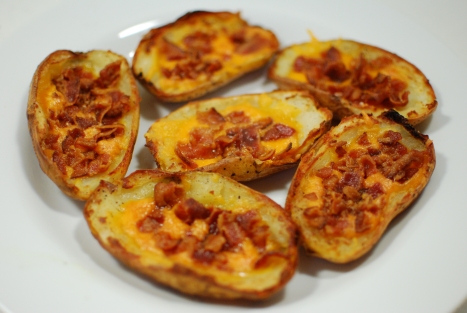
We recently attended a potluck event and I signed up to bring both an appetizer and a dessert.  David and I had been talking about how much fun it would be to make our own potato skins, so I thought this would be the perfect dish to take along.  It’s hard to go wrong with potato skins.  You get the slightly crispy outer shell of a potato and you get to fill it with whatever you want.  It’s like getting the perfect bit of a baked potato every time.  I filled them with the obvious choices- cheese and bacon!  These were also incredibly simple to make.  I baked and prepped the potatoes early in the day and right before leaving, I popped them in the oven to broil for a few minutes so they would be fresh when served.  These were a big hit.  David was definitely satisfied at this version of homemade potato skins and we will make it a point to have them around when football season rolls around this fall!

Loaded Potato Skins
Source: adapted from Simple Comfort Food

6-8 small russet or Yukon potatoes, rinsed clean

8 ounces sharp cheddar cheese, shredded

8 slices bacon, cooked and crumbled

¼ stick unsalted butter, melted

Salt and pepper to taste

Preheat oven to 400 degrees.  Poke the top of each potato with a fork and place on a baking sheet.  Bake for 60-70 minutes.  Remove from oven and let cool for about 15 minutes.

Cook bacon on stove over low heat, about 10 minutes.  Remove, drain on paper towels, then crumble into small pieces.

Once potatoes are cool, cut in half lengthwise, so that each potato will yield 2 skins.  Carefully scoop out center of the potato, while still leaving some potato in the boat.

Heat broiler to high.  Brush melted butter on the inside and outside of the potatoes.  Season each side with salt and pepper.  Place under the broiler for 8-10 minutes to allow the insides to get crispy.  Remove from oven and place cheese and bacon on each skin.  Return to the broiler for 3 to 4 minutes, or until cheese is melted and bubbly.  Remove from oven and serve.

Almond Joy Ice Cream

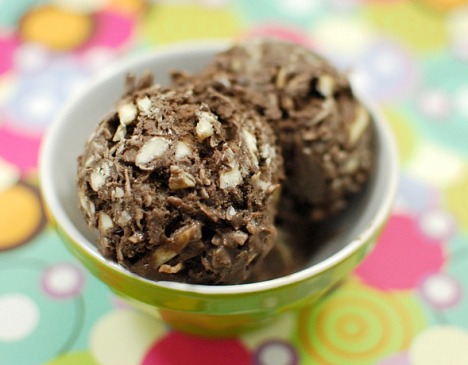
I’ve always been a fan of Almond Joy candy bars, so I immediately bookmarked this recipe when I saw it.  Unfortunately, I got busy making other things and forgot about this one.  We recently had a faculty meeting where they handed out mini candy bars, and as I reached for an Almond Joy, I thought of this ice cream and put it on my list for that week.  Once I made it, I couldn’t believe it had taken me so long!  This is one of my favorite ice creams.  It actually reminded me very much of the German Chocolate Ice Cream I made a few months ago.  It was a standard custard recipe, made very rich by the coconut milk and dark cocoa powder.  Mixing in the almonds and coconut gave it just the right texture.  I added way more coconut than the recipe called for just because I like a lot 🙂  If you are a fan of Almond Joys, this is certainly the ice cream for you!

Almond Joy Ice Cream
Source: adapted from How to Eat a Cupcake

1 ½ cups heavy cream, divided

1 cup whole milk

½ cup unsweetened coconut milk

2/3 cup granulated sugar

3 tablespoons dark cocoa powder

1 ¼ cups sweetened or unsweetened flaked dried coconut, divided

1 tablespoon vanilla extract

6 egg yolks

3 tablespoons cream of coconut

¼ teaspoon coconut extract

Pinch of salt

½ cup roasted almonds, roughly chopped (I used slivered almonds)

In a small saucepan, whisk together 1 cup heavy cream, whole milk, coconut milk, sugar, and cocoa powder.  Mix in ½ cup dried coconut and the vanilla.  Warm over medium heat, stirring often, until the sugar dissolved and small bubbles form around the edges, about 4-5 minutes.

In a small bowl, whisk together the egg yolks and the remaining ½ cup of heavy cream until blended.  Whisk ¼ of the coconut-milk mixture into the yolks.  Then whisk the yolk mixture back into the saucepan with the remaining coconut-milk mixture.  Heat over medium-low heat, stirring constantly, until thick enough to coat the back of a spoon, 4-5 minutes.

Pour the hot custard unto a bowl and cool completely in an ice bath, 30-45 minutes.  Once the custard has cooled to room temperature, remove from the ice bath.  Place a piece of plastic wrap directly on top of the surface of the custard to prevent a “skin” from forming.  Refrigerate until well chilled, at least 3 hours.

Place in an ice cream maker and freeze according to manufacturer’s instructions.  After churning, stir in the remaining ¾ dried coconut, cream of coconut, coconut extract, almonds, and a pinch of salt.  Transfer mixture to a plastic container and freeze.

Chewy Chocolate Cookies

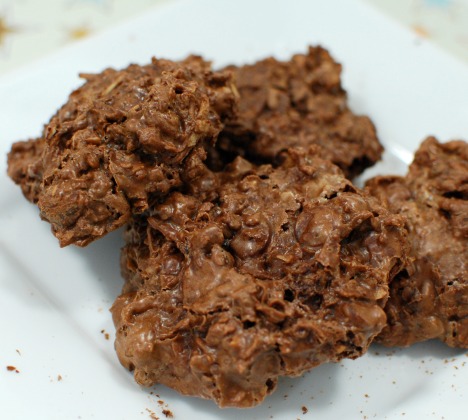
Oh, how I love the Pastry Queen!  I saw these cookies when I was flipping through her cookbook when I first got it for Christmas and immediately put them on my list.  They are so simple to make, and have helped me satisfy a chocolate craving in no time 🙂  I also like how easy it is to adapt them to your tastes.  You can make them very simple, or you can add in things such as coconut, various nuts, and chocolate chips.  I think these would even be good with white chocolate or peanut butter chips.  This time I kept the pecans that the recipe called for and added in coconut and chocolate chips.  I really liked them that way, and will keep trying new versions in the future.

Chewy Chocolate Cookies
Source: Pastry Queen Christmas by Rebecca Rather

2 cups whole pecans

3 large egg whites

2 ¼ cups powdered sugar

6 tablespoons unsweetened cocoa powder

Pinch of kosher salt

½ teaspoon vanilla extract

Preheat the oven to 350 degrees.  Arrange the pecans on a rimmed baking sheet in a single layer and toast them for 7 to 9 minutes, until darker in color and aromatic.  Remove from the oven, transfer to a bowl, let cool, and coarsely chop.

Reduce oven temperature to 300 degrees.  Line baking sheets with parchment paper or silicone mats.

In a large bowl, briskly whisk the egg whites until foamy, about 30 seconds.  Stir in the powdered sugar, cocoa, salt, vanilla, and pecans.  Using a 1-inch-diameter scoop, drop spoonfuls of dough 1 ½ inches apart on the prepared pans.  Bake for 8 to 10 minutes, until set and shiny, with zigzag cracks on top.  Remove from the oven and let cool on the pans for 5 to 10 minutes.  Using a metal spatula, transfer the cookies to wire racks to cool completely.  The cookies will keep for up to 1 week in an airtight container or 3 weeks tightly wrapped and frozen.

Snickerdoodle Cupcakes

Snickerdoodles are such a fun cookie, so I couldn’t resist making them in cupcake form.  I love cinnamon, and these cupcakes make it the central flavor.  These cupcakes were easy to make- basically your standard cupcake recipe, and their simplicity made the cinnamon stand out as the star ingredient.  They taste a lot like the cookie: sweet and simple.  Martha’s book states that snickerdoodles are thought to have a German origin, and that their name is likely a mispronunciation of schneckennudeln (crinkly noodles).  It makes sense, though, because cinnamon seems to have a huge role in traditional baked goods.  The recipe calls for a seven-minute frosting, but I thought a cinnamon buttercream would be better.  I used my favorite buttercream frosting recipe and simply added cinnamon until I got the desired flavor.  Snickerdoodles are a popular cookie, and everyone got really excited about enjoying them in cupcake form!

Snickerdoodle Cupcakes
Source: Martha Stewart Cupcakes, also found on marthastewart.com

1 1/2 cups all-purpose flour

1 1/2 cups cake flour (not self- rising), sifted

1 tablespoon baking powder

1/2 teaspoon salt

1 tablespoon ground cinnamon, plus 1/2 teaspoon for dusting

1 cup (2 sticks) unsalted butter, room temperature

1 3/4 cups sugar, plus 2 tablespoons for dusting

4 large eggs, room temperature

2 teaspoons pure vanilla extract

1 1/4 cups milk

  1. Preheat oven to 350 degrees. Line standard muffin tins with paper liners. Sift together both flours, baking powder, salt, and 1 tablespoon cinnamon.
  2. With an electric mixer on medium-high speed, cream butter and sugar until pale and fluffy. Add eggs, one at a time, beating until each is incorporated, scraping down sides of bowl as needed. Beat in vanilla. Reduce speed to low. Add flour mixture in three batches, alternating with two additions of milk, and beating until combined after each.
  3. Divide batter evenly among lined cups, filling each three-quarters full. Bake, rotating tins halfway through, until a cake tester inserted in centers comes out clean, about 20 minutes. Transfer tins to wire racks to cool completely before removing cupcakes. Cupcakes can be stored up to 2 days at room temperature, or frozen up to 2 months, in airtight containers.

Frosting Note: I made half the recipe for cupcakes and this full recipe of frosting and had some left over.  For a full batch of cupcakes, I would at least multiply this recipe by 1.5, if not double to be on the safe side.  If it’s too much, that’s okay, who doesn’t love leftover frosting? 🙂

Cinnamon Frosting
Adapted from Cook’s Illustrated April 2007

20 tablespoons (2½ sticks) unsalted butter, softened
2½ cups Confectioners’ sugar (10 ounces)
1/8 tablespoons table salt
2 teaspoons vanilla extract
2 tablespoons heavy cream
2 tablespoons cinnamon (or to taste)

In standing mixer fitted with whisk attachment, beat butter at medium-high speed until smooth, about 20 seconds. Add confectioners’ sugar and salt; beat at medium-low speed until most of the sugar is moistened, about 45 seconds. Scrape down bowl and beat at medium speed until mixture is fully combined, about 15 seconds; scrape bowl, add vanilla, cinnamon, and heavy cream, and beat at medium speed until incorporated, about 10 seconds, then increase speed to medium-high and beat until light and fluffy, about 4 minutes, scraping down bowl once or twice.